Getting Started
To use the programmer, connect the Arduino USB to the host computer and run a terminal program, such as TeraTerm (Windows) or Minicom (Linux). The Arduino development Serial Monitor can also be used as a terminal initially, but it does not support XMODEM transfers, so the READ and WRITE commands can’t be used.
Disable both hardware and software flow control in the minicom settings for best results.
Set the terminal’s serial parameters to 115200 baud, 8 bits, no parity, 1 stop bit to match the Arduino. Press the Enter key. If the connection is successful, TommyPROM will display a menu of options.
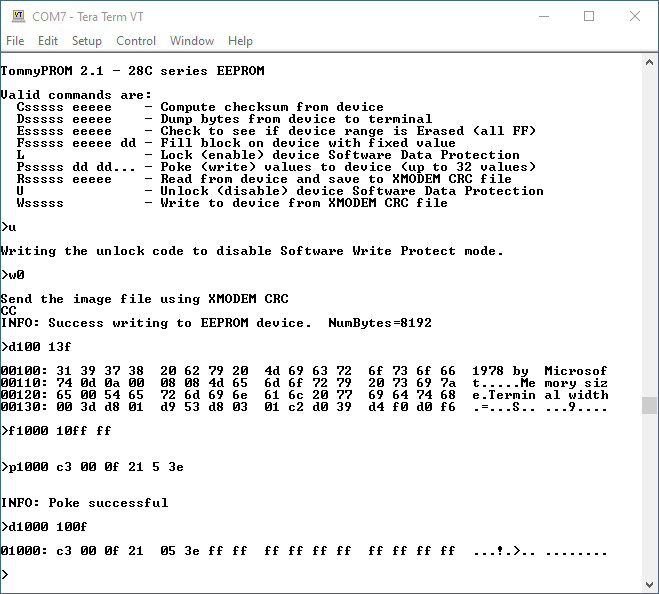
Most of the commands take a start address parameter, always entered as 1 to 5 hex characters. Leading zeros are not required. If needed, the end address parameter is also in hex. Parameters are separated by a space. For example, either of the commands:
d0000 01ff
d0 1ff
will dump memory from 0000H to 01ffH. Note that commands and parameters can be entered in uppercase or lowercase.
The R command is used to read from a PROM and save a binary image on the host. The W command receives a file from the host and writes (burns) it into the device. The R command needs a start and end address. The W command determines the end address from the received file size.
Once the READ or WRITE command is issued to the programmer, the transfer must be started on the host program.
Note that previous versions of TommyPROM used the XMODEM-CRC protocol to complete the file transfers for the READ and WRITE commands. This did not work well with minicom and other Linux programs that rely on the sz/rz commands. Versions 2.5 and later of TommyPROM now use basic XModem with the 8-bit checksum. The XModem-CRC support is still available as a compile-time option. See issue #19 for details.
The files used for READ and WRITE are simple binary images. This can be created directly by asm85 or can be converted from S-record or Intel HEX using an external utility.